unpopular opinion — fried chicken is a (relatively) quick meal — i’ll prove it
don’t leave, i can explain. fried chicken has become an impromptu weekend dinner for me . . . weird right? fried chicken definitely wasn’t something that I grew up eating often mostly because it isn’t the healthiest option, but also because of the prep work. but honestly, there isn’t a whole lot to it and, once you have mastered the art of frying, it can be a go-to dinner when you haven’t planned much else. most of the work is done in the brine.
the equipment.
i highly recommend frying in a dutch oven (for larger pieces, chicken breasts or cuts of bone-in chicken) and cast iron skillet (for smaller pieces, like tenderloin, cutlets or smaller-sized boneless chicken thighs). the key here is heavy and durable cast iron because it retains heat to keep the oil at the temperature needed for perfectly crispy skin.
you’ll also need a decent pair of kitchen tongs for safe handling of the chicken while it’s frying. once the chicken has cooked, we’ll transfer to to paper-towel or brown bag-lined plate or a wire baking rack to drain the excess oil. draining the oil will help keep the chicken crispy while it cools instead of soaking it up and making the skin soft.
the chicken.
whatever you prefer will work – you can use my frying method with any cut of chicken you prefer—dark or white meat, even boneless. the only thing that changes is the cook time. smaller, boneless pieces will fry much quicker than say a bone-in chicken breast.
chicken thighs are my absolute favorite cut of the chicken. if you’re making a fried chicken sandwich or salad, go for boneless, skinless chicken thighs. i generally prefer dark meat because I find that it holds more flavor and is less likely to turn out dry , like chicken breasts often do (although you’ll rarely have that problem with frying chicken generally).
the brine.
so this is why I find that fried chicken can be a relatively quick meal — always soak the raw chicken in a brine up to 24 hours before cooking, BUT if you don’t have the time, even 1 hour will do the trick.
the brine is essentially a “marinade,” but the purpose serves more than just to flavor the meat. the brine tenderizes and adds moisture to the meat, and is typically a combination of some liquid (buttermilk or water) and salt. below are some of my favorite brines — for each one, place the chicken parts in a large bowl + submerge the chicken in the brine + cover and refrigerate.
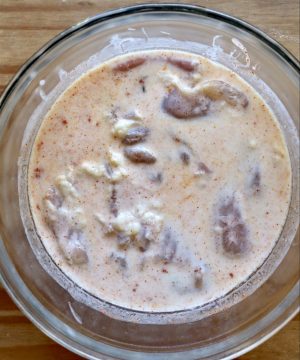
buttermilk brine
this brine is what i use for a classic buttermilk fried chicken. in comparison with the below sugar + saltwater brine, I find that the buttermilk brine method causes the chicken to hold slightly more oil when fried, but also more flavor and crispiness.
➵ 2-3 cups full-fat or low-fat buttermilk
➵ 1-2 teaspoons smoked paprika
➵ 2 tablespoons of kosher salt
➵ several turns of freshly ground black pepper
combine in a large mixing bowl and add raw chicken pieces. cover and refrigerate for at least 1 hour and up to 24 hours.
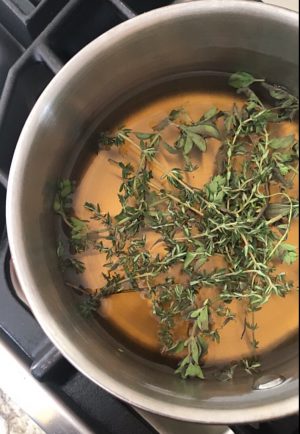
herby sugar + saltwater brine
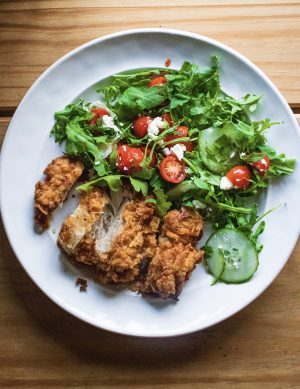
This is a great option for fried chicken when you don’t have buttermilk on hand or when you want a slightly less “greasy” fried chicken. I prefer this version for a light chicken salad.
➵ 2 cups of water + 1 cup of ice
➵ 2 tablespoons brown sugar
➵ 2 tablespoons kosher salt
➵ 8-10 sprigs of fresh herbs – oregano, thyme, rosemary (you can use all one herb or a combination)
heat 2 cups of water over medium heat and dissolve in it brown sugar and kosher salt for 30 seconds to a minute (i promise, the chicken is not going to be sweet). remove from heat and add 3-4 sprigs each of any combination of fresh oregano, thyme, and/or rosemary to the hot liquid. after a few minutes, transfer the liquid (with the herbs) to a empty large mixing bowl and add a cup of ice (3/4 cups of very cold water) then allow the liquid to cool fully. once cooled add chicken to the brine and cover and refrigerate.
the breading.
i think it’s a common misconception that the key to crispy fried chicken is the breading/coating. simple flour mixture works fine because the true key is in the frying method, especially the temperature of the oil. my go-to coating consist of flour and seasonings, typically:
➵ lawry’s seasoning salt (it sticks to the chicken much better than kosher salt, but I do not use too much since the chicken has been sitting in a salty brine)
➵ smoked paprika
➵ garlic powder
➵ onion powder
➵ dried oregano and/or thyme.
the frying.
the key to crunchy fried chicken is to not over crowd the pan. every time a piece of chicken is added to the pan, the temperature of the oil decreases, which can lead to soft/soggy breading.
if you are a novice chicken fryer, i recommend frying 1-2 pieces at a time especially if you don’t fry often. if you’re a bit more confident, three at a time works – but you’ll likely need to keep your high on the temperature and make sure the oil stays just hot enough. if the chicken is browning too fast, the oil might be too hot — turn the temp down so the chicken will cook throughly without burning the breading.
you’ll need to fry in an oil with a high smoke point—vegetable, canola, peanut, or grapeseed will work here. once the oil is hot + the coating mixture is on standby + and the chicken is sitting in the brine ready to be coated and fried, your assembly line is ready to go.
using tongs and working with one piece of chicken at a time, transfer from the brine directly to the coating, then to the hot oil (do not coat the chicken until it is ready to go directly into the hot oil). this is going to sound a bit crazy, but if you’re a novice fryer I recommend frying one piece of chicken at a time. the temperature of the oil should be hot enough that the chicken is sitting in a rapid fry, but not browning too quickly.
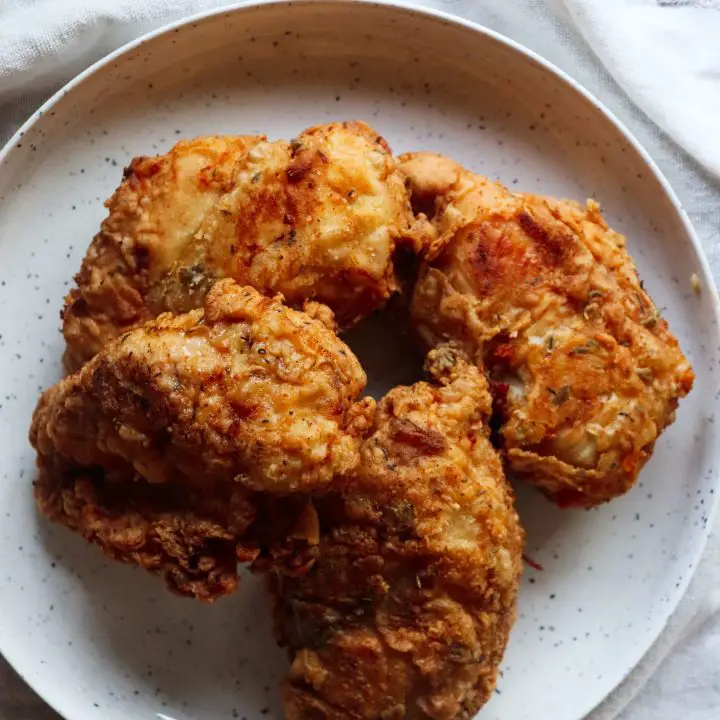
classic buttermilk fried chicken
classic buttermilk fried chicken that can be easily adapted for bone-in or boneless pieces. the chicken is soaked in a buttermilk brine for up to 24 hours and then coated in a simple flour mixture. before frying. serve boneless pieces atop a salad or on a sandwich. bone-in pieces are a perfect sunday dinner main.
Ingredients
- 2 cups buttermilk
- 2 tablespoons kosher salt
- 1 teaspoon + 2 teaspoons smoked paprika
- 1 1/2 cups all-purpose flour
- 2 teaspoons garlic powder
- 2 teaspoons onion powder
- 1 teaspoon dried oregano or thyme
- 1/2 teaspoon Lawry’s seasoning salt
- 1/4 teaspoon freshly ground black pepper
- oil for frying (preferably peanut, vegetable, canola, or grapeseed)
- 1-1.5 pounds of bone-in chicken thighs (or another preferred cut)
Instructions
- make the brine by combining buttermilk, kosher salt, and 2 teaspoons smoked paprika in a large mixing bowl. tightly cover the bowl with plastic wrap and soak the raw chicken thighs in the brine for at least 1 hour and up to 24 hours.
- when you’re ready to fry, remove the chicken from the brine and shaking/draining off most of the brine – do not rinse the chicken. heat oil in a dutch oven or cast iron skillet on medium-high heat – enough to cover at least 3/4 of the chicken. if you’re using a skillet, be careful not to fill to the top, as the oil needs room to move and overfilling could be dangerous.
- while the oil is heating, prepare the breading : in a mixing bowl, mix flour, garlic powder, onion powder, oregano or thyme, Lawry’s seasoning salt, black pepper, and 2 teaspoons of smoked paprika.
- working in batches of 2 pieces (3 pieces if using a dutch oven or 12-inch or larger cast iron skillet), toss the chicken in the flour mixture and transfer directly to the hot oil. the chicken should immediately begin to sizzle. to check if the oil is hot enough, drop a piece of an onion or a small lump from the flour mixture to see how the oil reacts—if there’s vigorous sizzling, it’s ready. once the chicken is in the oil, hit should start to brown gradually — if it’s browning too fast or the oil is to rapidly popping and boiling, lower the temperature. cook for about 10-14 minutes (depending on the thickness) flipping halfway through.
- fry the chicken on medium-high heat for about 8-10 minutes, flipping it halfway through. transfer to a paper towel-lined plate or wire drying rack. serve hot and crispy.

Leave a Reply